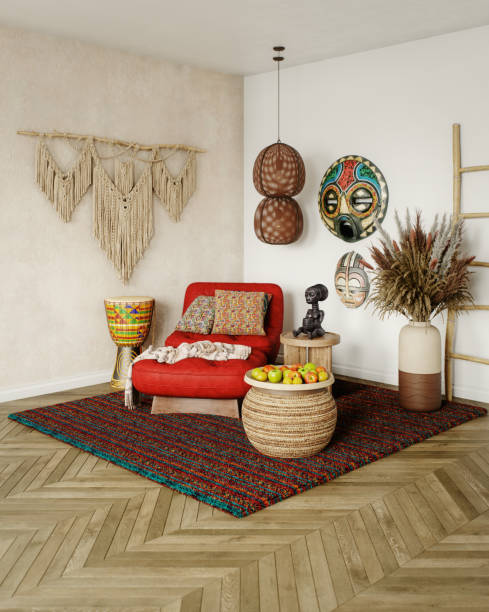
Boho (short for bohemian) style is all about expressing creativity, embracing natural textures, and adding a free-spirited touch to your space. One of the easiest and most beautiful ways to bring this vibe into your home is with a DIY boho wall hanging. These pieces are perfect for filling empty walls, and the best part? You don’t need to spend a fortune or be an expert crafter to make one!
In this beginner-friendly guide, you’ll learn how to create a simple and stunning boho wall hanging using affordable materials you can find at any craft store—or even around the house.
🎯 Why Make a Boho Wall Hanging?
Boho wall hangings are trending across the U.S. because they combine style, personality, and craftsmanship. They’re perfect for:
-
Living rooms, bedrooms, nurseries, or entryways
-
Apartment-friendly décor (no need for heavy drilling)
-
Personalized gifts or DIY home projects
-
Adding a cozy, handmade feel to modern or rustic interiors
Now, let’s dive into the fun part—making your own!
🧵 Materials You’ll Need
Most boho wall hangings are made using yarn, rope, and wood. Here’s a basic list of what you’ll need:
-
Wooden dowel, driftwood, or a stick (12–24 inches long)
-
Macramé cord, yarn, or twine in your chosen colors
-
Scissors
-
Measuring tape or ruler
-
Comb (optional) for fraying yarn or rope ends
-
Decorative beads, feathers, or faux flowers (optional)
You can customize the look with natural tones (like beige, ivory, and mustard) or go bold with jewel tones and black and white patterns.
🪢 Step-by-Step Instructions
Step 1: Cut Your Cord or Yarn
Decide how long you want your wall hanging to be. For a medium-sized piece:
-
Cut 12–20 pieces of yarn or rope, each about 2–3 feet long.
-
If you want a layered look, cut varying lengths (some longer, some shorter).
Fold each piece in half to prepare for the next step.
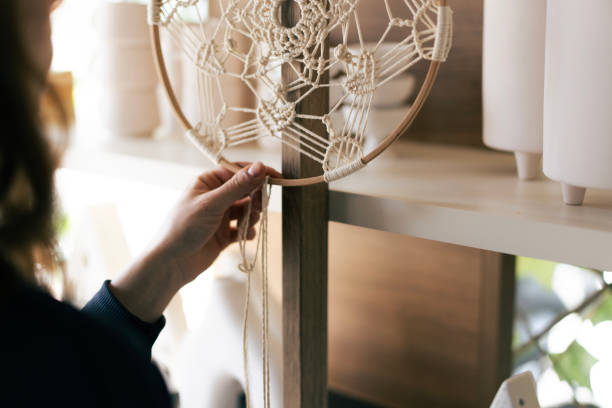
Step 2: Attach the Yarn to the Dowel
Use a lark’s head knot (super easy!):
-
Fold your yarn piece in half.
-
Place the loop behind the dowel.
-
Pull the two loose ends through the loop and tighten.
Repeat this for every strand, placing them evenly across the dowel.
Step 3: Create Your Design
There are several beginner-friendly design options:
-
Straight cut – Leave all the cords hanging evenly.
-
Diagonal cut – Trim the cords so they angle upward or downward.
-
V-shape – Trim the middle cords shorter and the outer cords longer for a downward “V.”
Use sharp scissors for a clean cut.
Step 4: Add Texture and Layers (Optional)
Want to take it up a notch?
-
Braid a few sections of yarn or rope and tie the ends with knots.
-
Incorporate beads by sliding them onto strands and securing them with a knot.
-
Add fringe by tying extra shorter pieces of yarn toward the bottom.
You can also make a second layer using a shorter dowel and hang it in front or behind for a 3D effect.
Step 5: Finish and Hang It Up
Tie a piece of twine to both ends of the dowel to create a hanger. Make sure it’s balanced so the piece hangs evenly on the wall.
Use a small nail or adhesive hook (for renter-friendly hanging) to display your creation.
✨ Tips for the Best Results
-
Use contrasting colors for a modern look, or stick with neutral tones for a calming, minimalist vibe.
-
Don’t be afraid to experiment—there’s no wrong way to make a boho wall hanging.
-
Comb out the ends of yarn to make a soft fringe for extra texture.
-
If using macramé cord, try simple knots like the square knot to add detail.
🌿 Customize It Your Way
Once you master the basic design, you can personalize your boho wall hanging even more:
-
Add dried flowers, feathers, or small wooden beads
-
Incorporate lace or ribbon for a vintage touch
-
Use multi-colored yarn to create a rainbow or ombré effect
These touches make your piece truly one-of-a-kind and reflective of your personal style.
🏠 Final Thoughts
Creating your own boho wall hanging is not just a fun DIY project—it’s also a way to bring warmth, texture, and handmade beauty into your home. Whether you’re decorating a new apartment, refreshing your bedroom, or just craving a creative outlet, this easy project is a great way to start crafting with confidence.
So gather your supplies, throw on your favorite playlist, and get ready to make something beautiful with your own two hands. You don’t need to be an artist—just a little inspired!